Posted on Leave a comment

Chakras and Crystals

In this post, you can find a little about the Chakras and their corresponding crystals for using in Meditation and Reiki. Some practitioners also use them as part of CBT or massage treatments.

This chart is helpful when doing the following courses.

This chart is not to be reproduced in any form. If you wish to purchase a digital file to print or use for yourself, please let me know by messaging me via the website, or by texting 07858169512, and I’ll arrange a purchase link to buy for £9.99. You will receive a high quality PDF suitable for printing and one suitable for using online / digitally.

Chakras Poster with Crystals by Salon Templates

This chart is not to be reproduced in any form without express permission from Sanctuary Training Academy and Salon Templates.

Posted on Leave a comment

Spray Tan Aftercare

If you want to make the best of your spray tan, there are some things that can help you keep it in tip top condition.

After The Tan

  1. Resist putting your hands in water immediately after your tan, and try to resist rubbing/dabbing your skin.
  2. Try not to get your skin wet, or it may streak. As difficult as that is, it means keeping your newly tanned skin away from rain, no swimming, avoid sweating if you can.
  3. Don’t have a spray tan, then go and get a manicure / peducure / facial / massage, actually, don’t do anything that might rub or remove the spray tan solution within the recommended time of your tan therapist.
  4. Don’t use creams/lotions/potions on your skin while your tan is developing, or it may streak.
  5. Let your tan develop for around 8 hours before taking your first shower or bath. When you take showers or baths, try to keep them short, to prolong the length of your tan.
  6. Don’t shave for at least 48 hours after a tan.
  7. Pat your skin dry after a shower or bath, instead of rubbing, as rubbing will remove areas of the tan.
  8. Moisturise, moisturise, moisturise after your first shower/bath. Keep your skin hydrated, especially in the areas of your body that are prone to dryness, such as elbows, knees, ankles.

As a general rule, long hot showers, long baths, hot tubs, saunas and swimming pools can significantly shorten the life of your spray tan, and cause the tan to wear off faster than expected.

Looking for How to Prepare for a Spray Tan? Click Here

Posted on Leave a comment

How To Prepare For A Spray Tan

Before coming for a spray tan, there are things you need to do, to make sure the tan is successful. Many clients blame the therapist, when they have really failed to prepare, and we all know that failing to prepare is preparing to fail. That old saying still holds water nowadays.

Prepare Your Skin

Showering

Don’t use oily body wash/shampoo/creams prior to a spray tan. Don’t shave your legs within 24 hours of a spray tan, or you might get a patchy result.

Exfoliate

Get rid of those dead skin cells that can leave you with dark spots and patchy skin. For a fabulous tan, get your loofah or exfoliation mitt out and get that skin prepared, preferably the night before, which will prepare your skin pores for the tanning treatment to come. By exfoliating, the spray tan will have a clean skin to work on, which will improve your tan.

What Strength of Solution?

This is a personal choice. Your therapist may try and persuade you not to go too dark a shade if it’s your first tan.

First Tan

Aim for something on the lighter shade of the colours available. Brides may want to use 6% or 8% light solutions for a natural lovely glow. Whichever shade you go for, make sure you are more diligent with preparing your skin with the darker shades, so the wearing off phase looks more natural.

For brides, or special occasions, have a tester spray tan a few weeks before the big day. You don’t want to find out you hate the shade of tan if you get sprayed the day before with a new solution/strength.

Darker tans on light/very light skin, can look unrealistic. Olive skins will be able to carry darker shades better.

How Deep To Tan

Your therapist may try to guide you, however client choice is always available. Most therapists will carry a base range, and possibly a rapid tan choice, so that the client can wash off the guide colour in around an hour, and the tan will continue to develop. Very brave people may leave those stronger solutions on on for longer.

Every persons skin is different. Some will take to the solutions better than others. Your therapist may have an idea of what a tan will look like on your skin type, but they cannot predict that 100% for everyone, and can only recommend based on your skin and the look you wish to achieve.

During the spray tan, your skin will change colour instantly. This is not the colour your final tan will be. The guide colour is for your therapist to see where they have sprayed, and identify any bits they might have missed. You should not be soaking wet before putting back on your clothes.

The Shades

Different companies use different methods of determining shades. This is a rough guide, but doesn’t cover all brands, who will have their own ways of determining shades, based on their chemistry.

Very Light – in the region of 6-8% DHA. Natural.

Light to Medium – in the region of 10% DHA. Natural

Medium – 12% DHA. Visible difference is skin colour.

Medium to Deep – 14-16% DHA. Experienced tanners, deep tan.

Very Deep – 18% – Not for novices. Experienced tanners.

Rapid Tan – 18-20% DHA

On The Day

Fresh Skin

No make-up, lotions, perfumes, moisturisers, oils, deodorants, body sprays etc etc.

Clothes

Wear loose clothes, preferably dark in colour as some colour may transfer from your skin to the clothes. While many fabrics will shed the colour during washing, not all will, so wear clothes that you don’t mind getting a little colour on.

What To Wear

For the tan, wear old bikini bottoms or underwear that you don’t mind getting tan on it. Therapists sometimes provide paper underwear, but it doesn’t hide anything, and won’t follow the lines of clothes you normally wear. Spare yourself heartache and bring some old dark clothes to get tanned in.

Jewellery

Remove your jewellery or that will show as a white line.

Feet

Pop some sticky feet on the soles of your feet, or if you can’t use them, your therapist will give you some towels or couch roll to stand on, and swivel, so that the soles of your feet are protected from solution.

Barrier Cream

Barrier cream will likely be applied to your ankles, toes, toenails, fingernails, elbows and knees. Your therapist may do this, or you might be given the cream and instructed on how to apply it yourself. These are high skin cell shed areas, which tend to react differently to tanning solution.

Hair Net

Your therapist will put on a hair net for you, and ensure it is at a level on your head that means there is no visible tan line at your scalp. The hair net protects your hair from tan solution, and keeps your hair away from areas to be tanned, but it needs to be placed properly, or there will be a tan line. Your ears must not be covered, and it must not sit on your forehead.

There may be pictures in the room, to help you with the different positions to move into, so the therapist can tan your properly.

Panic

If you really hate the tan, and it isn’t a deep tan solution or rapid tan, you can usually go straight home and wash it off, as tan takes time to develop.

Looking for the Spray Tan Aftercare Post? Click Here
Posted on Leave a comment

Introducing Body Massage as a Course

Now available, is the GTi Body Massage course, which is fully accredited by the Guild of Beauty Therapy, and on offer here at Sanctuary.  You could begin taking your own clients or adding this treatment to your own list of available treatments for your clients.

Body Massage makes a good addition for a Reflexologist and Indian Head Massage practitioner, as well as being a fabulous stand alone treatment.

What could you do with this treatment?

  • Full Body Massage
  • Back, Neck and Shoulder Massage
  • Hand and Foot Massage (makes a great add on for facials – for that empty time when the mask is on)  A great way to give that something extra to your client.

Cost £265

The theory is online and covers all anatomy and physiology needed for this stand alone course.

Now available for booking online, or simply send us an e-mail at ask@sanctuarytrainingacademy.co.uk

You will have approximately 21 hours of online study to do at home, which covers all aspects from reception to videos of the body massage routine itself.  When those have been completed, you come to us for your practical session.  On successful completion of both elements, you will be able to download a PDF version of your Guild Accredited Qualification, which will allow you to gain insurance and work within the industry. The course has a CPD points value of 39.

Bookings now open.  Course can be bought by getting in touch with us, or through the product page – Body Massage Training Course

Payment is via Paypal or by direct Bank Transfer.  We can send you an invoice for payment if you would prefer to book this way instead of online.

Pre-requisies:  GTi Professional Standards for Therapists – Free with the course if you do not already have it.

On completion of this course, you will be entitled to buy the Aromatherapy GTi course, to allow you to perform Aromatherapy massage.

We look forward to seeing you soon.

Posted on 1 Comment

How to start a beauty therapy business.

For those who are new to the industry, or who just want to brush up on a few new skills, you’re in the right place, as the beauty therapy industry is a stable profession with a constant demand for services.  Even with the recession, people like to take care of themselves, so our industry has remained strong and healthy.

What to think about:

Mobility

In the modern age, many clients are now seeking to have services provided in their own homes, so this isn’t just a business where you are stuck having to try to find a job, or hire a room.  You can go mobile to test the waters, or convert a room in your home to give a more professional service to your clients.  If you stay open to all options, you can provide services in a business premises by renting a room for some days, and do mobile for a couple of others, which is especially helpful for older or infirm clients who might not make it to a salon, but who would still benefit from and would like to have services provided for them.  I know an 83-year-old lady, who is and virtually bed bound, but she likes to be pampered with gentle arm and hand massage, and loves a manicure.

Product Sales

Many clients look at the products in salons and then go and buy them online, where they don’t have premises costs, and can bulk buy cheaper.  Keep your investment in products low, until you are sure there is a demand for them.  It’s very tempting to go for a rep sales pitch, who wants thousands up front for starter packs, but starting off a business in debt might not be the way to go, if you are unsure of your market and whether the clients you draw will purchase them.

Website Promotion

We almost all know that we do need a website presence for the best outcome for our businesses, but they aren’t always easy to do, and if you approach a specialist, they can cost a fortune.  There are free options, such as WordPress and Google, which are great to get started off, and allow you to get a foothold on the world-wide web with a little work and attention.   With a little investment and research, you can also self-host your own website for a few pounds a year by buying a domain name and a hosting package around £25 a year.

Qualifications

Beauty therapy courses are a great way to get started, and a foothold in the industry.  As well as being qualified in the area you have studied, you can choose piece by piece, to add to your skills as your business grows.  There are several things you need to take into account.  We have a range of courses at Sanctuary Training Academy, that will be widened in 2018, and allow you to practice a variety of treatments and services within the industry on the general public.

Insurance

When you are qualified, you will need insurance to practice.  You require public and product liability to protect yourself and your products and equipment.  In the rare event that a salon has a flood, fire, or damage, you can go out of business if your stock and equipment are all lost, and you cannot afford to replace them.

Costs

Costs are easy to spiral out of control.  If you work mobile, you limit your costs to training, insurance and products to deliver your services, but you are very likely to need a method of transport, you might incur parking charges, and your equipment needs to be light enough for you to move around.

If you rent a room, you have to consider the rent cost and where you keep your products and materials to work with.  There may be other charges such as electric, internet and telephone, or possibly even a share of a receptionist if one is available.

It’s very tempting in the beginning, to try to buy everything at once, before you’ve even had one client.  Keep a handle on how much you are spending, and try to keep within your budget.

Getting Customers

The internet will refer to this as marketing.  It’s good to have an idea of who your customers will be, what they are likely to buy, and what you can afford to provide for them.  Be careful with offers and deals, as although they might attract clients initially, those clients may just hop from one business to another, depending on who has the best deal on at the time.   Look for where your customers might be, whether it’s on social media, newspapers or local magazines.

Going For It

You’ll never know until you try, right?  Once you are qualified, you have a new long-term skill, that you can pick up at any time.  Starting a new business is a scary prospect for everyone, but many people do that every day.

Paperwork

Getting your paperwork looking good is a first step for any business.  There are plenty options to ensuring you have the right tools for your day to day working.  A simple thing, such as tailoring your social media, can work wonders for a new therapst starting out without a client base.

Posted on Leave a comment

New Year, New Career

The New Year is almost upon us.  It’s the time of year that many of us make new resolutions for the coming year.  You might make plans to lose weight, stop smoking, change career, or any number of other potential changes for your life.

There are many good reasons for beginning to look for a new career.

Some are:

New Challenges

At this time of year, many of us look to change careers, as the potential for change, for a new us, is abundant in the media, which is very powerful indeed.

Home Life Balance

Looking at our home life balance is often at the forefront of what people want to do as a life change, often based around the desire to work in an area that we enjoy.   Who wouldn’t want to be able to choose their working hours, or have a part-time job to top up an existing job, and work at time that suits you?

Opportunities Become Available

It’s like one of those eureka moments, when you realise something is within your grasp.  A promotion comes up, a new idea ticks around your brain, or you make a decision on the spot, to find something new to do.  You might be looking for a new role, or increased responsibility, but it might not be available at your place of work, so you look elsewhere.

Taking Action

Many of us dream of doing something different, but for one reason or another, don’t take that jump forward.  One year, that New Year spur to change, when you are in the right frame of mind, could be the year you start doing something about it.

Networking

You’ve spoken to someone who’s given you a great idea, and started off a chain reaction in your head, where it’s buzzing with the potential of new opportunities and potential.

Training

You spot the perfect training for you.  It fits around your current job, or is at the right price, and fits in with your future plans.

Independence

Many of us get to this point.  We don’t want to work for someone else any more.  If the opportunity arises for us to work for ourselves, and the training and prospects are right, then we may just decide to take the plunge and change the direction of our lives, or just add to it.

Smart Thinking

You decide to take the resolution you make every year, and turn it into a smart target, or a goal you can work towards, and potentially achieve.  There are very few of us who don’t know about making goals, but we do often forget how to make them realistic and achievable in our lives.

To make goals we can meet, they have to smart goals that we can work towards, without being so far out of reality, that we can’t ever reach them.   Our goals need to be well-defined.

  • Know what you want to achieve.  What is that goal?  Pin it down to a point where we can work out the steps to progress.   Start with your CV, and make it readable, decide what you want to do, or which industry you want to work in, and gather information on how to find work in that industry.
  • Focus on what you enjoy and what you are good at.  If chemistry isn’t your thing, don’t look at work as a scientist.  If being pampered is top of your list of things you enjoy, consider beauty and holistic therapies.
  • Set a time to achieve your goals.   If you need to retrain, find out how, and how long it takes to complete the course.   Will you learn by attending college, doing theory online, or via private schools with accredited learning?  Know how long each step within a step takes.
  • Make the goals meaningful.  Something you want to do.  Write it down and make sure you keep a record of progress.
  • Add a timescale to your written goals.  Make the timescale one you can meet.  Don’t put down that you want to be a fully fledged beauty consultant in two months, if it will take you six months to do the theory.
  • Monitor your progress and revise your goals as you go.  If it’s taking longer to do something than you planned for, rearrange your time schedule instead of being despondent about your progress.  Sometimes life gets in the way, and rather than abandoning your plans, just revise them.
  • Keep your written goals somewhere you can see them.  On the fridge, as your screen saver, or your wall……..
  • Lastly, enjoy the process.  It’s taking you somewhere you want to go.


Posted on Leave a comment

Learning Techniques

Studying is all about finding the time to get things done.  When all is said and done, the washing up will always need done, as will running a hoover around the floor, or dusting the furniture, or doing a load of laundry, or watching the TV, or a myriad of other things we do, to put off, ignore, or try to forget things we need to get done.

Apart from finding time, the next big thing we need to do, is actually find a way of remembering and bringing back the material that we spend time learning.  There are many techniques we can use to find time, and then bring back learning.

What use is a learning technique, if you haven’t learned to put aside everything else in your head.  Here are some common ones.

1- Detachment 

For me, this is detachment from the external environment, whether we are in a library, a busy hall, a classroom, or at home in our living rooms.  Learning to detach from the world around us, to concentrate on learning, is an essential technique in your learning skills toolbox.

2 – Self Study & Asking Why

This is mandatory for us all.  Just looking at lists of facts, or statements of the what, can lead to struggling while learning.  In my experience, asking a ‘why,’ question, is what gets me to the right conclusion.  More often, I label that as putting things into practice.

If we think of the beauty therapy industry, and consider the fact that we carry out a patch test for tinting, it’s easy to think it would be safe to ignore that patch test, if we don’t know why we test..

Knowing the ‘why,’ could save the sight of one of your customers.  Eyesight is precious.  Finding out you have an allergic reaction on the inside of your arm might cause a little discomfort, but finding that out when you have tint around your eyelids, could risk sight, and is easier to remember.

3 – Self Testing

Kids do this all the time, with past papers for their exams.  It’s a good thing.  As well as getting the chance to try old questions in your area, you also get the chance to answer, and then research the answers, to ensure you go down the right road with your answers.

4 – Highlighting Text

I believe this works for many people, but for me, not so much.  Ok, certain phrases stand out, but the whole context is lost, unless the text is all bullet points to begin with.  I much prefer technique 5, in conjunction with technique 4.

5 – Summarising

This has always been my personal favourite.  At University, I’d take all my lesson notes for the year, and break them down into a few A4 documents for the whole year.  I missed out joining words and flowery fillers, keeping the important points, and highlighting the points that couldn’t be missed, for any reason whatsoever.  Close to exam days, I would ditch all other paperwork and books, and just concentrate on those A4 sheets for each subject.

6 – Mind Mapping, or Visualisation

I have bad memories of trying this, going back to a couple of decades ago, when it was all the rage.  People would draw their little bubbles, with more bubbles and arrows coming off them, and slot words into those arrows….  The thought still pains me to this day.

In the work setting as a wall chart, fine.  As a learning technique, for me, it was useless.  I spend many years wondering why so many others swore by visualisation, and thought I must have something wrong with me, as I just didn’t get it.  Years later, reading an innocent article in a newspaper gave me my answer.  Some of us just don’t have great visual recall.  I know colours and think I can see them with my eyes closed, yet I can’t.  I also can’t listen to someone telling me something and visualise it in 3D in my mind.  I have shapes, and outlines, and varying degrees or blah, but no definite minds eye or vivid imagination.  I know what people look like, yet I can’t pull up an image in my head.  I don’t quite know how to describe it, but bringing images out in my mind, doesn’t result in crystal clear memories for me to pluck at.  Learning for me, has always been about memorising information and answering questions by understanding the reality behind the theory.

7 – Little and Often, Repeated

While I fully understand this is likely to be one of the best ways to learn, it isn’t for everyone.  This can also be split into two different learning methods, ie little and often, and repeatedly going over the same learning.

What Do You Use?

At the end of the day, whichever of these learning techniques, or any other ones you use, comes down to the best one for you.  While we are all expected to learn, we’re rarely taught how to learn, and often end up floundering around, just doing the best that we can.  Knowing what works best for us, can help when we begin to plan our learning in any way, and ensure we don’t end up buying packs and packs of highlighters to make pretty pictures when we don’t learn visually.


Posted on Leave a comment

iZettle Review: Mobile Credit Card Reader (Chip & Pin Machine)

Almost all new businesses seem to find a way to accept cards these days, and that includes beauty therapists, whether they’re mobile, renting a room, or own a whole business.

It’s not enough to simply accept cash.  As a consumer, I know how rarely I take money out of the bank, so in all fairness, I’m unlikely to be able to pay for anything  much without paying by card somehow.

The problem with the big card machine providers and their merchant accounts, is the price, and being required to obtain a merchant account.  On top of monthly fees, you can often be charged the  processing fee, although those charges may suit you if you like taking payments over the phone.  It is worth investigating, to ensure you find the best payment solution for you.

Today, I’m looking at the iZettle.

It’s great for small and growing businesses, and especially for sole traders and mobile therapists.

I’m not surprised that this little gadget is doing well.  Deposits to your bank happen after just a few business banking days, and you can take payments anywhere your phone can get signal or wifi.

(image from iZettle.com) Card Reader and Dock

iZettle Credit Card Machine Features

  • Small and easy to set up.
  • Receipts detailing individual purchases, which regular chip and pin machines don’t provide.
  • E-mail and/or text receipts to customer.
  • Connects quickly to a phone.
  • Takes contactless payments.
  • Takes Apple pay and Samsung pay.
  • Rates start at 1.75% per transaction and 2.5% for invoicing.  That’s nothing to sniff at.
  • Does NOT need a merchant account.
  • Can use for business and for personal use.  Sole traders should sign up for a business account.
  • No set up fees and no monthly payment.
  • Works via the iZettle app, connecting quickly via bluetooth to your phone or tablet.  Can use the app for a full product list, which will be broken down on the receipt, or just for a simple price total.
  • Charges by the USB cable, or a separate dock if you have one.
  • Battery lasts a good length of time, if you remember to switch off the reader when not in use.

Price to Buy

There is no rental term on the iZettle, so it is a purchase outright to own gadget.  Some of the readers are older versions, so make sure you get one that is compatible with your own systems.

There are two options when it comes to paying the fees.

Go

  • No monthly fee.
  • Perfect for those new to the system, 1.75% transaction fees, with 2.5% for invoicing.
  • E-mail and phone support Mon-Fri 9am-5pm.

Go Plus

  • £20 Month.
  • Sales reports broken down into different staff members where needed.
  • Increased support, with week nights and weekends.  Mon-Fri 8am-8pm.  Sat/Sun 9am-6pm.
  • iZettle reader lifetime warranty.
  • Try free for 30 days.

Accessories

You can buy additional accessories for your iZettle.  If you just have the reader, you can buy a dock, cash drawer, POS system and even a printer for receipts if your clients prefer a printed receipt to an e-mailed or texted one.

What do I think?

I think these are a great wee solution to getting a toe in the card reader machine market.  They’re a cost-effective solution for small businesses and sole traders starting up.  I think it’s definitely worth a look for everyone setting up or owning a small business.  Just do your due diligence and ensure you know what the rates and costs are for each payment processing system, before you buy.

My favourite function, apart from the start up percentage rate, is the ability to add individual products and have those on the receipt.  That’s a great thing to have.

I like the option to add an image to the receipts, which helps with our branding, and there’s a great option to add customers e-mails where they agree, to help with future marketing.

The library function for different products allows for different variants with different prices, which allows for speedy itemised receipts for your customers, but there is also a quick function, so we can just add a pounds and pence amount and sent it straight to the card reader.  A percentage or figure based discount option is also very nice indeed.

I am not in any way affiliated to iZettle.  This is an independent review and I am in no way responsible for your intended or actual purchase of the system, in any way whatsoever.


Posted on 1 Comment

What do I NEED, to start a Waxing Business

Today, we’re looking at the question most new waxers ask, which is that of “what do I need to start a waxing business…”  This is part of a recurring theme on our blog, as we move through the treatments and how we take our idea to the next level, and not just for Aberdeen either, although that is where we are based.

For all of these areas, limit your searching on the internet, especially if all you can turn up, is very expensive kit that is well out of your price range.

In reality, although a waxing kit is the first thing you need when you add waxing to your business, or whether you are starting with waxing as your first ever venture, make sure you do your research before buying, and only buy what you need to start-up with.

Training

If you haven’t yet had your training, that’s where you should start.  If you are someone who’s regularly had waxing done, you may have a product that you prefer over others.   There are lots to choose from.

If you like a particular brand that only lets you use their products if you have had their training, then it stands to reason, that is the training you should look at.

Here at Sanctuary Training Academy, we run the GTi Waxing course, whereby you carry out the theory online, and come to us for the practical session.

The course is generic and allows you to buy wax from recognised suppliers like Ellisons, Capital and Salon Services.

Kit

Think about what kind of waxing you are going to provide and how you will provide it, before you purchase any kit.

Ok, down to the basics of your waxing kit.
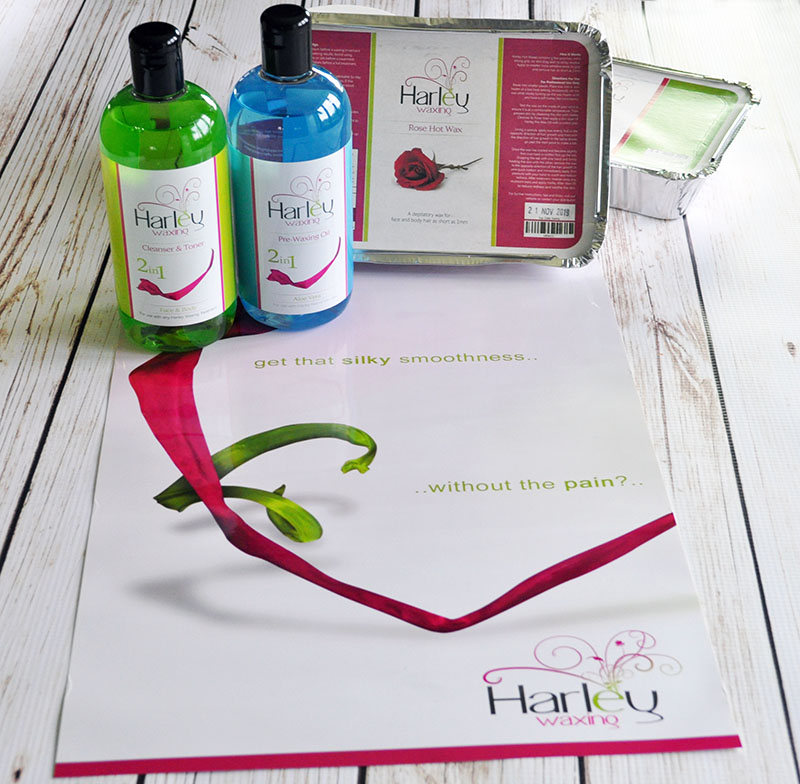
  • Wax – Choice of strip wax, hot wax, film wax.  Strip wax requires strips to remove, where hot and film wax are removed without strips.
  • Wax Heaters / Pots – (you might want to have a double pot or triple, depending on the type of waxes you are using.)
  • Waxing Rollers – optional instead of using strip wax on large areas.
  • Wax Strips – for strip waxing.  (you might need different size strips, or you can cut them to size.)
  • Wax Solvent Cleaner – for cleaning the wax pot.
  • Cleanser. Depends on your brand.
  • Pre and Post Waxing Oil.  Depending on your brand.
  • Spatulas.
  • Scissors.
  • Sanitising Medium – eg Barbicide for scissors, and skin cleansers for your hands and clients where required.)
  • Client Record Cards.
  • Accessories.

Waxes

In the UK, Sienna X, Lycon Wax and Harley Wax are popular choices, as are the salon own brands in the suppliers.

Get to know the terms, so you  know what you are looking for.

  • Hot wax tends to be cooler to touch than warm wax, and is generally for smaller areas as it is removed by hand.
  • Film wax is like hot wax, but applied with a spatula and removed by hand, like a hot wax, and is suitable for larger areas like legs.
  • Warm wax is creme wax, is strip wax, all of which is removed by using fabric strips.

Wax Heaters

The choice of wax heater is quite large.  For strip and hot wax, there are single, double and even triple pots, that allow for different waxes in each pot.  Nowadays, you can buy additional inserts for the pot, so that all you have to do, is take one pot out and replace it with another of a different scent, ie rose wax or gold wax.

Most frequent waxers, will also have wax cartridges, whereby a rolling action is used to lay on the wax, and strips are then used to remove it.  The advantage of this method of laying on strip wax is speed, however it does need dedicated wax cartridge heaters to follow this method.  Some therapists will just use wax and spatulas to lay on wax, but many others prefer the cartridges.

Wax Accessories

The nice to have items, that make life easier, and are optional but not essential.

  • Wax Trolley or rollator case to keep all your items in one place.  While this isn’t mandatory, it does help to keep all your products to hand. If you’re mobile, a case just for waxing is often a good idea, as you could be moving around with still hot wax, and if that spills, it will make whatever it comes into contact with so sticky, that it won’t be useable.  Some suppliers have fabulous kits on offer that include almost everything, including fabulous trolleys with storage, the heater and lotions needed too.
  • Drip collars which are paper circles that collar the wax heater, to catch any drips and save you removing the wax by hand.
  • Therapy couch with additional plastic cover.  I’ve seen mobile therapists rock up and wax clients while they lie on a towel on the floor.  For me, this isn’t an option.  I like a therapy table with a plastic cover on it.  The plastic cover ensures my table doesn’t get covered in sticky wax, is easily washable, and the table stops me getting backache.
  • Apron, to help remove the potential for spillage on your uniform.
  • Gloves, to protect your hands from the wax.


Posted on Leave a comment

Sell, Sell, Sell

If you’ve ever wondered how to sell products to your clients, you’ve come to the right place.

At any time of year, it’s difficult for those of us in the beauty industry to know how to retail products to clients, and get the selling part right.  We know that we should do it, and although we’d love to have this instant revenue for our businesses, it’s not always an easy thing to do.

It’s usually that beauty professionals and therapists are not fully comfortable with the actual selling.  I know that in the past, I’ve struggled with offering products to customers, as I tended to think they’d assume I was being pushy, and just trying to get more money out of them.  At some time of year, having gifts on display does help, such as Christmas and summer preparation, but if we’re not sure how to go about it, how do we maximise the potential that we COULD have?

Ok, lets put it this way.  We can only earn a set amount per day with treatments, and if some of those clients pull out at the last minute, we cannot replace that potential for lost revenue.  Where we can make some of that up, is the after treatment sales, but knowing how to do that is difficult for many, if not all of us.

Retailing is a good source of business once we get past the worry of how to do it.  We tend to not be fully comfortable with pushing products on our clients, and the Beauty Guild has a whole article about it for Christmas retailing in their monthly gazette for November, so get your books out and read them when they arrive.

The guild has its own training course to help you with this problem, which is the GTi course in Successful Retailing, and might be perfect to help you, if you’re struggling to retail to your own clients.

The course is carried out online and guides you through the process of retailing, to help you sell products to your own clients in a confident manner.  The sales techniques you will learn, will help you understand where new opportunities for your businesses could come from.

The modules are:

  • Preparation
  • Approach
  • Questioning
  • Demonstrating
  • Response
  • Closing
  • Following-Up

At first look, it does look pretty scary.  You’ll work through the modules and it will help you to see how you could improve or change your own sales technique, or build one in, if you’re struggling.  You study at home, and at your own pace, choosing where and when to complete your theory.  On average, it takes around 7 hours of study to complete this course, and it is worth 7 CPD points, allowing you to have an award from the Guild of Beauty Therapists when you’ve completed it, which is perfect for your beauty room wall, or your portfolio.

Here at Sanctuary Training Academy, you can purchase the course for £39 online, and with a little discount for existing students of our school.  If you are an existing student, or are already a student, studying a different course with us, contact us for your 10% discount code on:

ask@sanctuarytrainingacademy.co.uk